Gold Header Ad
reserve your ad hereCuring cannabis, and in fact even drying cannabis seems shrouded in a bit of mystery for some of you. The good news is that REv is here to help. My curing process has evolved over the years, and I made another adaptation about a year or two ago. Lemme ‘splain…
I was watching a grow vid on the YouTubes and the guy was talking about drying and curing his buds. He was an organic grower, and I grabbed a couple great tips I employed with great success. This article will just be straightforward showing you these cool drying/curing strategies and tools. As always, we are 100% human here, no AI (obviously) was used to write this article. Just me man—king of jungle only here to help … LoL … Let’s get into it.
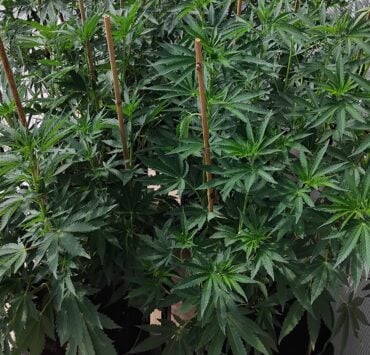
Step One – The Hang

This part, the drying part is a very simple thing, there are a few “rules” regarding this stage I adhere to that I want to share.
- I’m a big believer in darkness when your plants are hanging to dry. It doesn’t have to be pitch black or anything, but at least dim is a must in my opinion. At the very least, keep it at least dim for the first week of hanging. Intense light—especially sunlight—will often cause the resin properties to become very narcotic in my experience.
- You can hang branches or entire plants. You can wet-trim your plants if you like, I don’t do this myself. I hang entire plants without any wet trimming. This way my plants take 30 days to dry and the larger leaves shield the drying resinous buds from light.
- You want your plants to take AT LEAST two weeks to dry before you seal them up in jars. This is essential I think for terpene development along with other resin properties.
- Where I hang my plants has air exchange and air movement. My temperatures range around mid 70’s to mid 80’s F. My humidity stays around 50% and in wetter months I employ a dehumidifier to keep my humidity below 55%.

Some Tools I Recommend for the Next Step – Curing Cannabis Baybee
Here’s a few of the tools I use for drying and curing my cannabis. Above in this article you can see my trusty dehumidifier. I most definitely recommend one of those if you live in a “wet” zone like I do, very often plagued with high humidity.

Curing Cannabis with Mini Hygrometers
These mini hygrometers – Mini Hygrometers on Amazon – are genius, and when I first saw them being used like this, I slapped myself in the forehead and wondered why I hadn’t thought of it, heh heh. Once you have placed your dried buds into jars you just drop one of these hygrometers right in the jar and seal it up. Let it stay sealed up for about 12 to 24 hours and check the humidity. Isn’t curing cannabis fun?

After 12 hours open the jar(s) and check the humidity. If it is above 55% the buds will need to be removed gently and dried out some more in front of a fan before being placed back into the jars where you repeat the cycle until the humidity is below 55%. Then remove the hygrometer, boom!
Curing Cannabis with Silica Dehydration
Food Safe Silica Packets link. I’m sure you have all seen those silica/silica dehydration packets that come with some electronics etc. Well, the good news is that they are also made for use with food, safely, and so, I love to use them with buds and here’s how…

After you have dried your buds and trimmed them, but just before you put them in their jars for curing cannabis in, drop one of these silica dehydration packets in the bottom of the jar—photo below.

This takes the guesswork out of, “are my buds dry enough to seal up yet”, question that we have all asked ourselves. These little silica packets take care of any small amounts of unwanted moisture in the curing jars. It’s a beautiful thing.

Curing Cannabis, and Why
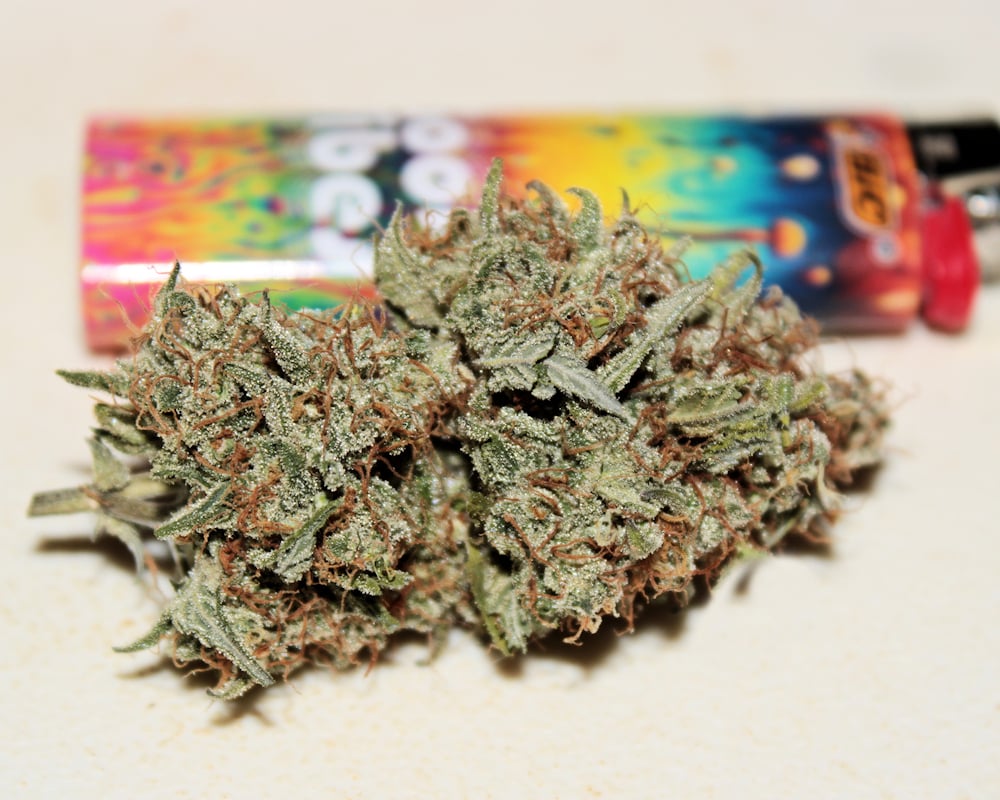
Now, I like my buds dry-dry in their jars—I call this “Mummy Buds” and they store for years like this all good. The first thing you’ll need is a location. I like larger sized coolers for this job. When storing dry cannabis, I have found it is very important to not only keep temps on the cooler side, but to keep any temperature changes over any 24 hour period very minimal. The cooler accomplishes this. I keep them sealed up for at least 30 days before I call them cured.

I like to only open one jar per cannabis variety at a time. Then I burn through that whole jar before I open another one. I like to move small amounts—3 or 4 grams at a time—into even smaller jars to have ready to access for smoking/vaping.

Once your buds are out of the larger jars they begin to absorb moisture from the air. They get extra stinky as this happens. If your environment humidity is above 50% you don’t want to expose even your small jar of buds to the open air for more than a couple minutes at a time. Mummy Buds will rehydrate a bit too much in wet environments if left out in the open air for like 45 minutes.

Afterword – Curing Cannabis

Hey man, grab a copy of my latest book on Amazon right here: Rev’s Latest Book on All Natural Cannabis Growing – True Living Organics. You’ll be glad you did.
Well, I gotta say, the little hygrometers and the silica packets were a game changer. As long as your buds are close to totally dry when you put them in their jars, a single silica packet in the bottom of the jar is plenty to ensure that jar will be dry. Once you have seen the humidity in the jars is all good—after 24 hours sealed up—you can just remove the hygrometers.
The silica packs are also reusable, yup. The instructions to “recharge” (dehydrate) them are on the package. You just pop them into the oven on low temp for a bit and boom, brand new packets ready to dry stuff out. Nice! They are pretty reasonably priced too, I think. Here’s a link: Silica Dehydration Packets Food Safe on Amazon. Ya’ll wanna consume more Rev? Here ya go: Rev’s Rave MILF Black Forrest. Check out my YouTubes channel if ya wanna, it’s all about True Living Organics:

Recently the official website for Kingdom Organic Seeds (KOS) came to an end. Shit happens, heh heh. Anyways, you can still get your KOS seeds from these official retailers…
I hope you enjoyed Curing Cannabis today! I put up a pic (below) showing how to recharge the silica packs FYI. Until next time my green friends, L8r G8rs.
- REv 😊